


How To Choose The Right Faucet For A Vessel Sink
Views: 0 Author: Site Editor Publish Time: 2026-06-28 Origin: Site


A striking countertop setup instantly elevates bathroom design. You achieve this aesthetic peak by installing a beautifully crafted vessel basin as the focal point. However, pairing this stunning fixture requires careful calculation. Mismatched faucets often lead to excessive splashing. They create inadequate hand-washing clearance or force awkward ergonomic reaches. You might find yourself constantly wiping down wet vanity tops.
Choosing the right faucet goes far beyond visual appeal. It functions strictly as an exercise in geometric compatibility. We must perfectly balance spout height, spout reach, and hidden installation constraints. In this guide, you will learn exact clearance rules to prevent daily splashback. We will walk you through optimal mounting styles and vital plumbing preparations. You will finally discover how to create a setup offering both flawless function and refined style.
Key Takeaways
Standard deck-mounted faucets will not clear the rim of a vessel basin; tall vessel-specific or wall-mounted models are required.
Spout reach must align directly with the basin’s drain to minimize splashback.
Wall-mounted faucets require precise behind-the-wall plumbing (rough-ins) and structural planning before drywalling.
Vanity depth and hole placement dictate whether a single-handle or widespread handle configuration is viable.
The Geometry of a Vessel Basin: Calculating Height and Reach
Geometric precision dictates the success of your bathroom setup. A vessel basin sits completely above the counter. This elevation fundamentally changes how water interacts with the fixture. You cannot guess dimensions. You must measure carefully to ensure comfortable usage and dry counters.
Clearance Requirements
Clearance refers to the vertical gap between the basin rim and the faucet aerator. You need enough room to wash your hands freely. If the gap is too small, you will repeatedly bump your knuckles against the fixture. If the gap is too large, water accelerates too much before impact.
Industry best practices recommend a strict clearance window. You should maintain a minimum gap of 1 to 2 inches above the highest point of the rim. This specific measurement allows comfortable hand washing without crowding the space. It also keeps the drop distance short enough to mitigate severe splashing. Always verify the overall height of the basin first. Add your desired 1-to-2-inch clearance to find the ideal spout height.
Spout Reach Alignment
Spout reach is equally critical. It defines the horizontal distance from the faucet mounting hole to the water stream. The water stream must hit directly over the center drain. You can also aim slightly behind the drain. You must never allow the water to hit the sloped sides of the basin. Striking the curves creates an immediate splashback effect.
Follow these steps to calculate the perfect spout reach:
Determine the exact center point of the drain hole.
Measure horizontally from the drain center to the proposed faucet mounting location.
Account for the thickness of the basin wall.
Select a faucet featuring a spout reach matching this exact distance.
Dimensional Risks
Estimating these measurements is a common mistake. You risk ruining expensive countertops or dealing with permanent splash issues. Never drill holes based on manufacturer specifications alone. Physical dimensions occasionally vary slightly from printed sheets. Always measure your specific basin depth and rim thickness directly. You should have all physical items on site before marking the vanity.
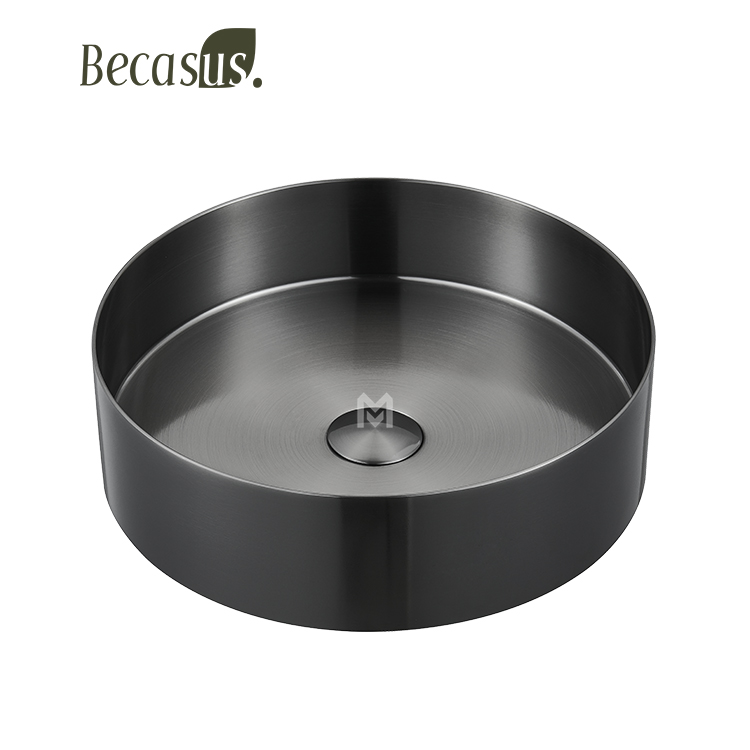
Solution Categories: Deck-Mounted vs. Wall-Mounted Faucets
You generally choose between two primary mounting solutions. Each approach offers distinct aesthetic benefits and specific installation challenges. Your choice largely depends on your plumbing readiness and vanity layout.
Tall Deck-Mounted Faucets (Vessel Fillers)
Tall deck-mounted faucets sit directly on the vanity top. Manufacturers design these specifically as vessel fillers. They feature an extended base to rise above high rims.
Best for: Retrofits, standard vanity setups, and simpler plumbing installations. You avoid opening walls.
Evaluation Criteria: You must check the total height. Most vessel fillers range from 10 to 15 inches tall. Assess the stability of the base. Taller faucets are inherently prone to wobbling if not anchored securely. You need robust mounting hardware beneath the counter to hold them rigid.
Wall-Mounted Faucets
Wall-mounted faucets emerge directly from the drywall behind the sink. This style creates a clean, floating appearance.
Best for: Maximizing counter space, achieving minimalist aesthetics, and accommodating unusually tall or oddly shaped basins.
Evaluation Criteria: You must carefully select specific spout lengths. Assess the thickness of your backsplash material. Measure the exact distance from the finished wall to the drain center.
Implementation Reality: This approach requires a compatible rough-in valve installed inside the wall. Plumbers must run supply lines through the studs. We do not recommend this style for quick weekend remodels. You must open drywall and coordinate framing before finishing the room.
Mounting Style Comparison Chart
Feature | Tall Deck-Mounted | Wall-Mounted |
|---|---|---|
Installation Difficulty | Moderate. Requires secure deck anchoring. | High. Requires in-wall plumbing adjustments. |
Space Efficiency | Takes up deck space behind or beside the sink. | Excellent. Frees up the entire vanity top. |
Ideal Basin Type | Standard shapes, 4 to 6 inches in height. | Extra tall basins, irregular shapes. |
Remodel Stage | Can be done post-drywall. | Must be planned pre-drywall. |
Flow Rate, Aerators, and Splash Prevention Strategies
Controlling water behavior matters just as much as choosing the right height. A tall vessel basin setup alters normal water dynamics. You must actively mitigate splashing through smart component selection.
Water Pressure Dynamics
Water velocity increases as it falls. Standard under-mount sinks have low faucets. The water travels only a few inches before hitting the drain. Vessel setups feature elevated spouts. The higher drop accelerates the water. When fast-moving water hits a shallow basin, it forcefully ejects outward. You must tame this energy.
The Role of Aerators
Aerators serve as your primary defense against splashing. An aerator forces air into the water stream. It breaks a solid column of water into a soft, bubbly flow. This softer flow dramatically reduces impact force.
Some modern faucets feature laminar flow. Laminar flow produces a clear, glass-like stream of solid water. It looks visually stunning. However, laminar flow is highly prone to splashing in shallow basins. It acts like a solid rod hitting a hard surface. We strongly advise choosing aerated streams over laminar configurations to maintain a dry vanity.
Flow Rate Compliance
Flow rate directly impacts splash severity. The industry measures this in Gallons Per Minute (GPM). High-flow faucets overwhelm shallow basins instantly. You should look for WaterSense compliant fixtures. These typically run at 1.2 GPM. Combining a lower GPM rating with a high-quality aerator represents the most effective splash mitigation strategy available.
Handle Configurations: Ergonomics and Vanity Space
Your vanity real estate dictates your handle options. You must consider how you will operate the faucet daily. Ergonomics play a major role in user satisfaction.
Single-Hole / Single-Handle Designs
A single-handle design stands as the industry standard. This configuration integrates the spout and the mixing handle into one unit.
Pros: You only drill one hole in the countertop. This leaves maximum room for the basin itself. It also simplifies operation. You enjoy easier one-handed temperature control. You can turn the water on and adjust the heat simultaneously.
Widespread / Three-Hole Configurations
Widespread setups separate the spout from the hot and cold handles. They offer a classic, symmetrical look.
Risks: You will struggle to fit this on standard 21-inch deep vanities. Once you place a large 16-inch round basin, depth becomes scarce. Squeezing three separate components behind the basin creates massive crowding.
Maintenance Issues: Cleaning between the handles and the basin wall becomes a significant pain point. Dust and water pool in tight gaps. You will find it difficult to slide a sponge behind the fixture.
Placement Strategy
You do not have to place the faucet directly behind the basin. Shallow vanities often require creative positioning. Consider an offset installation. You can mount the faucet at the 10 o'clock or 2 o'clock position relative to the drain. This strategy reclaims valuable depth. It pushes the faucet into the unused corner zones. It also creates a dynamic, modern aesthetic.
Implementation Realities: Countertop Drilling and Plumbing Pitfalls
Execution requires patience. A beautiful design fails if the installation process introduces errors. You must follow strict guidelines before cutting into stone or wood.
The "Order of Operations" Rule
The golden rule of bathroom remodeling is simple. Never drill the countertop early. You must wait until the actual components arrive. You need the basin, the faucet, and the drain hardware physically on-site. Mock up the layout dry. Set the items on the uncut counter. Check the clearances yourself. Verify the spout reach aligns perfectly with the drain center. Only then should you mark your drill points.
Hole Sizing and Spacing
Drilling demands precision. Most single-hole tall faucets require standard hole diameters.
Measurement Area | Standard Requirement |
|---|---|
Standard Faucet Hole Diameter | 1 3/8 inches |
Standard Drain Hole Diameter | 1 3/4 inches |
Recommended Cleaning Gap | 2 to 3 inches (minimum) |
You must leave a minimum of 2 to 3 inches between the outside basin wall and the base of the faucet. This gap guarantees cleaning access. If you mount them too close, grime accumulates. You will eventually have to use a toothbrush to clean the tiny crevice.
Pop-Up Drain Compatibility
Drain hardware creates widespread confusion. Standard bathroom sinks feature a hidden overflow channel. They use overflow pop-up drains to match. However, elevated designs almost always lack overflow holes. They are solid bowls. Therefore, buyers must ensure the faucet pairs correctly. You must purchase a non-overflow pop-up drain assembly. Installing an overflow drain in a non-overflow bowl leads to immediate and severe leaking beneath the counter.
Conclusion
Choosing the perfect fixture requires careful attention to geometry and flow dynamics. You must measure the exact basin height to establish proper clearance. You must determine the exact drain center to guarantee accurate spout reach. Select your mounting style based entirely on your plumbing readiness and vanity space. Finally, choose an aerated flow type to soften water impact and keep your counters dry.
Take action before making any final purchases. Locate the specification sheets for your desired products. Cross-reference the exact dimensions against your vanity blueprint. Verify your handle configuration fits the physical depth of your counter. When you align these geometric rules properly, you create a flawless daily experience.
FAQ
Q: Can I use a standard bathroom faucet with a vessel basin?
A: No. Standard bathroom faucets lack the necessary height. They sit too low on the vanity deck. You will not clear the elevated rim. Even if water barely trickles over the edge, you will lack room for comfortable hand washing. You must choose a tall filler or a wall-mounted design.
Q: Where exactly should the water hit in a vessel sink?
A: The water stream should land directly over the center drain. Aiming slightly behind the drain also works well. You must prevent the water from hitting the sloped side walls. Striking the curves creates an aggressive splashback effect. Precise spout reach alignment keeps your vanity dry and clean.
Q: Do wall-mounted faucets need a special valve?
A: Yes. Wall-mounted faucets require a specific rough-in valve. Plumbers install this directly inside your wall structure. It controls the water mixing. Manufacturers often sell this rough-in valve separately from the external handles and spout. You must install this component securely before finishing the room's drywall.
Q: Why does my vessel sink splash so much?
A: Splashing usually stems from three main errors. First, the spout reach is wrong, causing water to hit the sloped sides. Second, the faucet sits too high, accelerating water velocity before impact. Third, the faucet lacks an aerator. You need an aerated stream to soften water impact and reduce splashing.


